
Locations
How to create, list, edit, delete, and manage geofenced office locations in WorkClock HQ.
Locations
Use Locations to manage branches, offices, project sites, and attendance geofences. Locations determine where employees are allowed to clock in when location-based attendance is enforced.
Open it from Company Settings > Locations, or go to /company-settings?tab=locations.
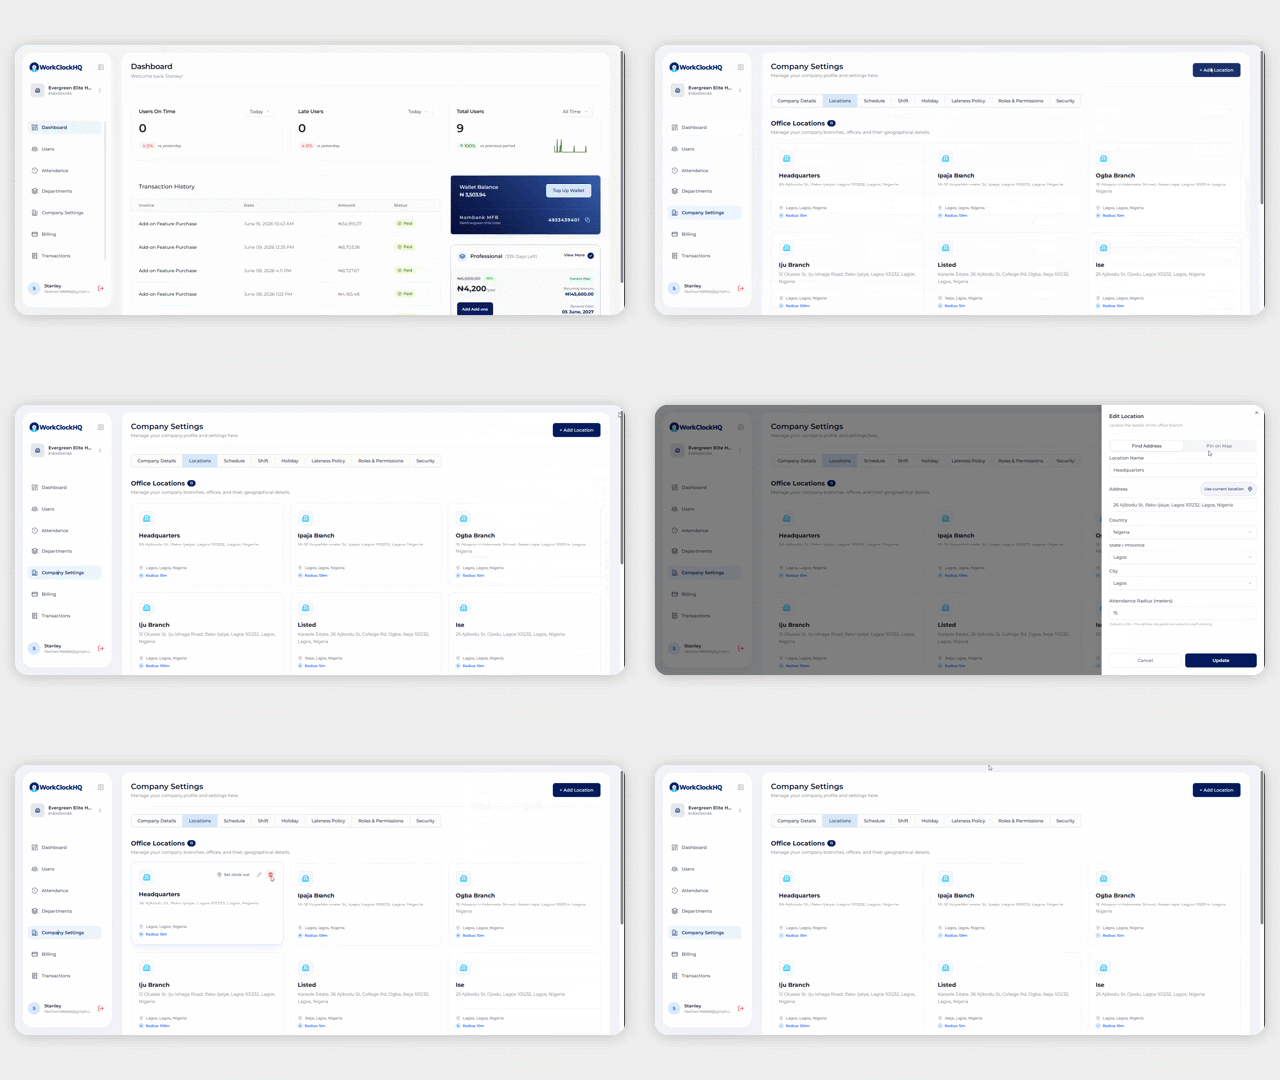
What The Locations Page Shows
Each location appears as a location card with:
- Location name.
- Street address.
- City, state, and country.
- Attendance radius in meters.
- Edit and delete actions, if you have permission.
- Set clock out action when multiple locations exist and you have employee update permission.
If no locations exist, the page shows an empty state with Add First Location.
How To Create A Location
- Open Company Settings > Locations.
- Click + Add Location.
- Review the location limit indicator if it appears.
- Enter a Location Name, such as
HeadquartersorLekki Branch. - Choose how to set the location:
- Find Address: search for an address and let the system fill address components and coordinates.
- Pin on Map: enter or select latitude and longitude directly on the map.
- Enter or confirm country, state, and city when using address mode.
- Set Attendance Radius (meters).
- Click Create to save once, or Create and Add Another to save and immediately clear the form for another location.
Address Mode
Use Find Address when the branch has a searchable street address.
Available actions:
- Search for the address.
- Use Use current location to prefill the form from the browser's current location when available.
- Confirm country, state, and city.
- Set attendance radius.
Map Pin Mode
Use Pin on Map when you need precise coordinates or when the address is difficult to find.
Available actions:
- Enter latitude and longitude manually.
- Move the map pin to adjust the exact point.
- Let the map resolve address, city, state, and country when possible.
- Set attendance radius.
Attendance Radius
The attendance radius defines the geofence around the location. Employees assigned to that location must be within the allowed radius to clock in, unless their work setup allows clocking from anywhere.
The default value is 10 meters. Use a larger radius for buildings with wide entrances, large compounds, shared offices, or areas where GPS accuracy is inconsistent.
How To Edit A Location
- Open Company Settings > Locations.
- Find the location card.
- Click the edit icon.
- Update the name, address, coordinates, city, state, country, or attendance radius.
- In the edit panel, configure the Clock In and Clock Out settings:
- Toggle Clock in enabled to allow or restrict staff from registering arrival at this location.
- Toggle Clock out enabled to allow or restrict staff from registering departure at this location.
- Click Update.
Clock-In And Clock-Out Controls
When editing an existing location, the controls allow you to toggle the following actions:
- Clock In Enabled: (Enabled by default) When active, staff can clock in (register arrival) if they are within this location's geofenced radius. If disabled, clocking in from this location is blocked.
- Clock Out Enabled: (Enabled by default) When active, staff can clock out (register departure) if they are within this location's geofenced radius. If disabled, clocking out from this location is blocked.
This allows administrators to temporarily or permanently pause clocking activities at specific office branches or project sites without deleting the location.
How To Delete A Location
- Open Company Settings > Locations.
- Find the location card.
- Click the delete icon.
- Read the confirmation message carefully.
- Type the required confirmation text:
DELETE Location Name. - Click Yes, Delete Location.
Deletion is permanent. Before deleting a location, confirm that no active employees still depend on it for clocking.
How To Set Clock-Out Location For Employees
When there is more than one location, the card may show Set clock out.
Use this when employees need to be clocked out or reassigned in relation to a specific location. The action opens a bulk clock-out location dialog.
Plan Limits
Location creation checks your active subscription. If the current plan includes a limited number of locations, the add form can show usage such as 2 / 3 used.
If the limit is reached, upgrade the plan or purchase the relevant add-on before adding another location.
FAQs
Why can employees not clock in at a location?
Check that:
- The employee is assigned to the correct location.
- The address or map pin is correct.
- The attendance radius is large enough.
- Clock-in is enabled globally under Security.
- Clock-in is enabled for that specific Location (under the location edit settings).
What radius should I use?
Start with the default, then increase it if legitimate users are blocked because of GPS drift, large buildings, or weak location accuracy.
Can I add locations by coordinates only?
Yes. Use Pin on Map, enter the latitude and longitude, and save the location.
Why can I not add another location?
You may have reached the location limit for the active subscription, or you may not have location creation permission.